Create a proxy endpoint
ℹ️ Check the overview page to learn more about automatic installation refresh and webhooks.
This page explains how to configure the proxy endpoint creation webhook:
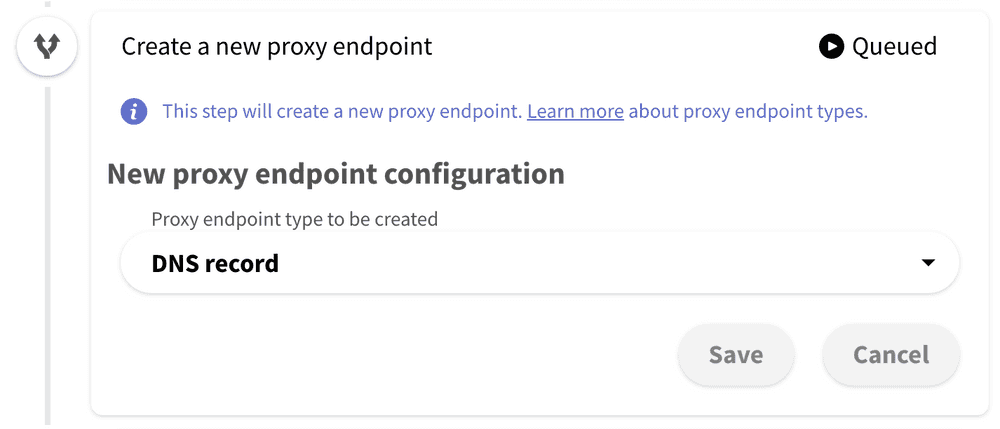
The implementation of this webhook depends on which proxy endpoint type you are using. The proxy endpoint type can be configured in the "Create a new proxy endpoint" step, where you can select to create either DNS-based proxy endpoint or path-based proxy endpoint:
ℹ️ Read about proxy endpoint types to choose which one to use in your case.
Practically, changing the proxy endpoint type will influence just 2 webhook variables, HOST and PATH. For
the DNS proxy endpoint it would be
HOST=url-key.yourwebsite.comPATH=/
And for the path-based proxy endpoint these values would instead be:
HOST=yourwebsite.comPATH=/url-key
The url-key value from the example above is also provided as the URL_KEY variable. You can find the full list
of variables you can use in this webhook directly in the DataUnlocker Admin Console.
Implementation for DNS proxy endpoints
ℹ️ Read about setting up PATH proxy endpoints below.
When using DNS proxy endpoints, this webhook must create a new DNS record on your domain. This implementation highly depends on your nameservers provider and your company's security policies. We provide some examples below (DigitalOcean) for you to illustrate how could it be implemented.
We provide a few examples on how to implement automatic DNS configuration for:
DigitalOcean DNS
This example demonstrates how can one setup a webhook which configures a new DNS endpoint via DigitalOcean DNS. We will use DigitalOcean API to create a new proxy endpoint, as our domain uses DigitalOcean's nameservers.
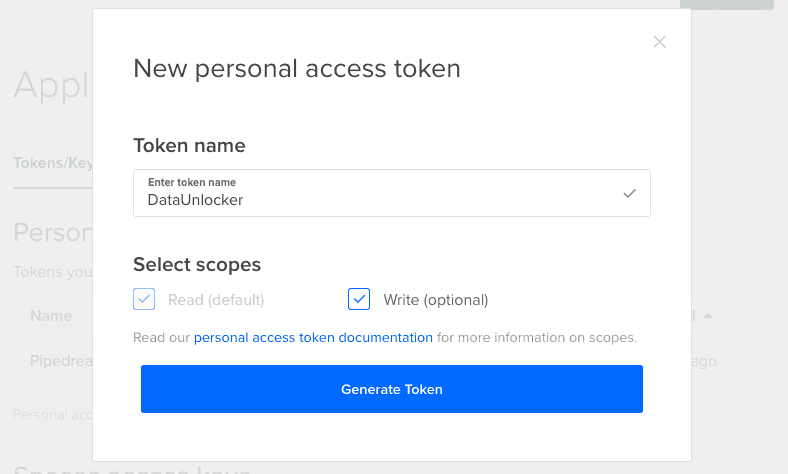
For most of APIs, including DigitalOcean's, you first need to generate an access token and grant it the narrowest possible permissions. See DigitalOcean's docs on how to create a new access token:
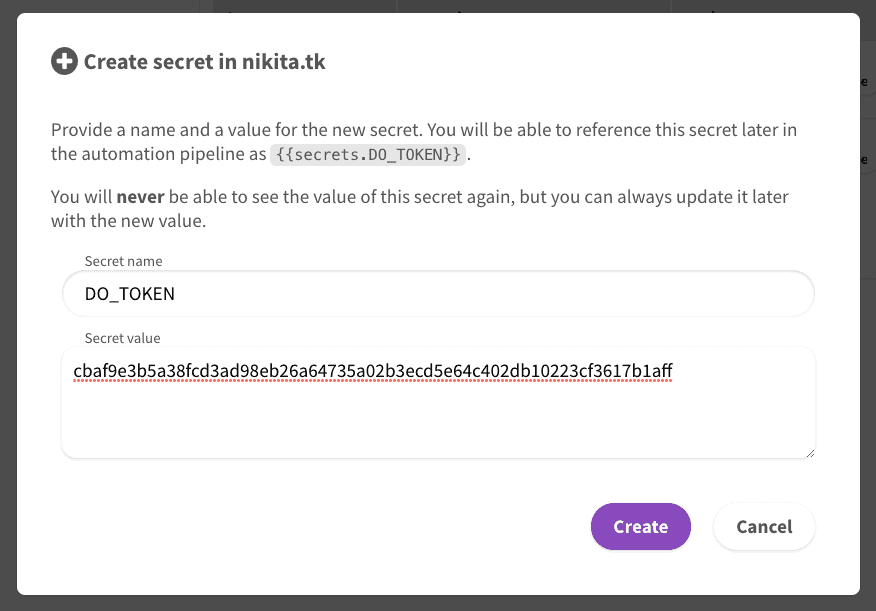
Now you can access DigitalOcean's API with the newly created token, which should look like cbaf9e3b5a38fcd3ad98eb26a64735a02b3ecd5e64c402db10223cf3617b1aff.
Let's use secrets to store this token, as we don't want it to be displayed
anywhere on DataUnlocker. Later, we will be able to reference this token using {{secrets.DO_TOKEN}}.
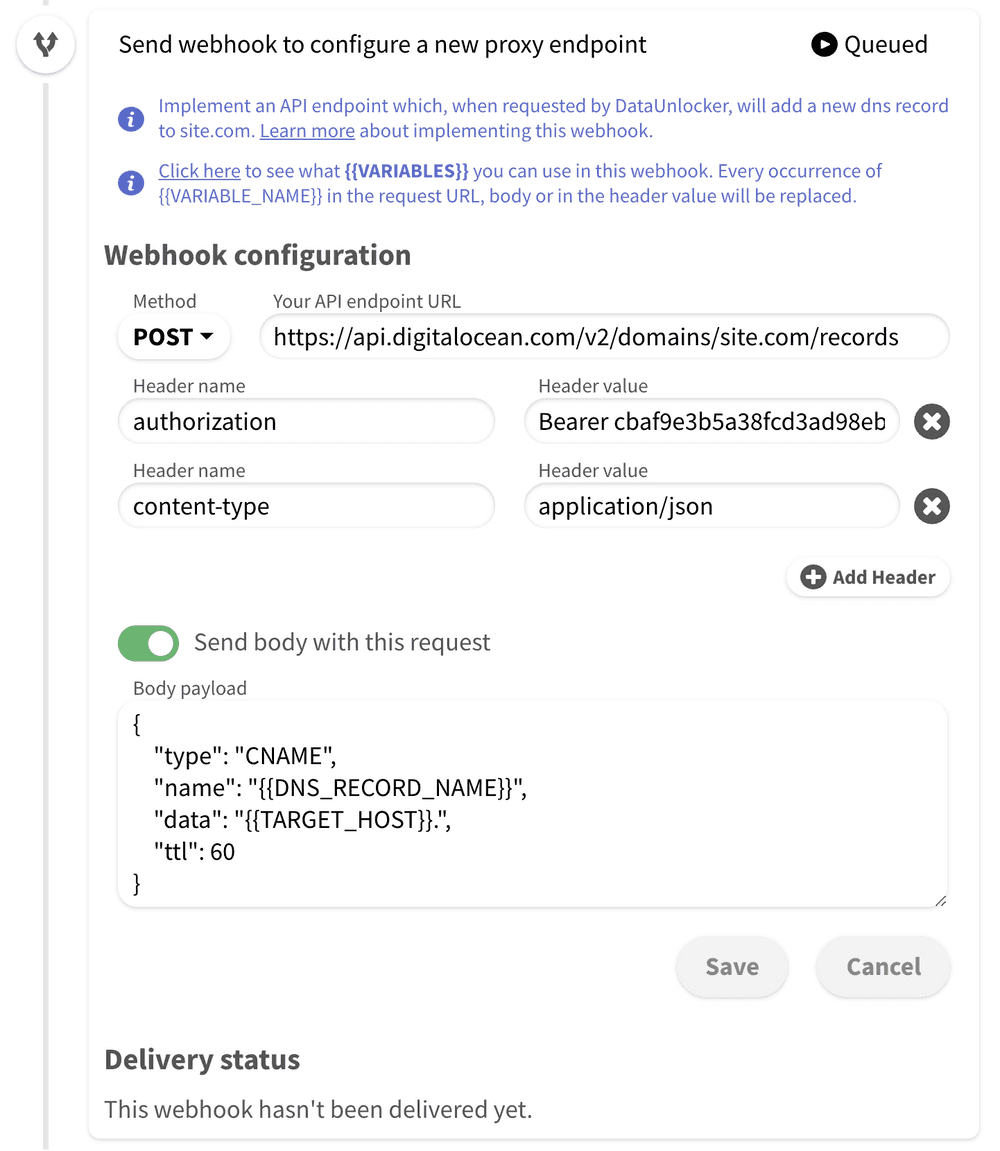
DigitalOcean's API docs explain how to create a new proxy endpoint, and based on it we can embed this call directly to DataUnlocker with the following settings:
- "Your API endpoint URL" equals to
https://api.digitalocean.com/v2/domains/site.com/records, wheresite.comis your domain name; - Method is
POST. - Header
authorizationequals toBearer {{secrets.DO_TOKEN}}(DigitalOcean's token we've previously obtained and saved in a secret); - By clicking "Send body with this request" and using the following JSON body:
☝️ Note that small{ "type": "CNAME", "name": "{{DNS_RECORD_NAME}}", "data": "{{TARGET_HOST}}.", "ttl": 60 }.at the end of thedataproperty value, it is required by the DigitalOcean create record API spec.
The resulting configuration will look like this:
After pressing "Save" (and configuring other pipeline steps), try running this automation pipeline to test whether this webhook works. You will be able to abort the pipeline at any time.
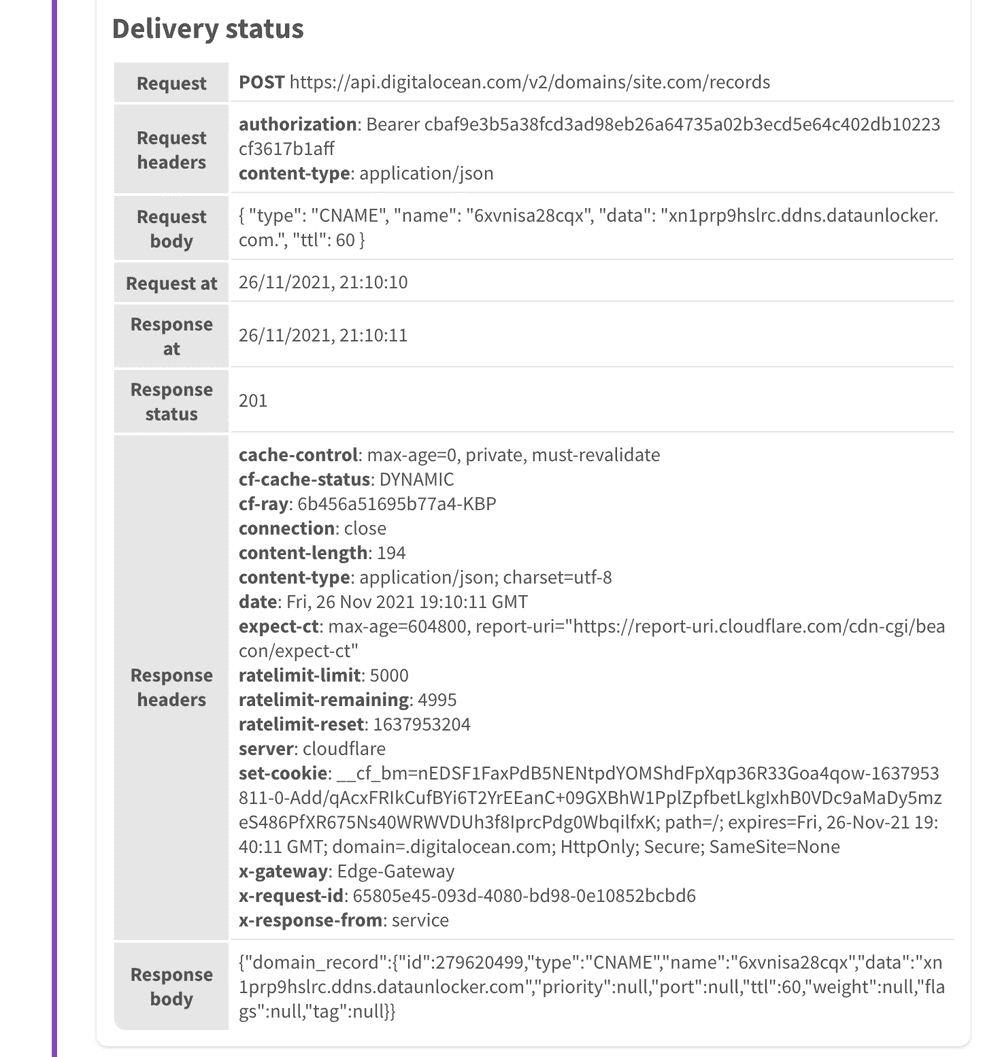
- You can analyze both the request and the response of the executed webhook.
- If the webhook fails (either receives statuses 4xx/5xx or times out), DataUnlocker will use exponential backoff with the maximum interval of 16 minutes to retry it. After 2 days (the default) of unsuccessful retries the pipeline step will eventually fail and send the email notifications requesting a manual action.
Congrats! Now we've successfully created a new DNS record using the DigitalOcean's API.
CloudFlare DNS
First, you need to obtain a token for DNS updates from CloudFlare Dashboard. Grant edit access to DNS zones for this token.
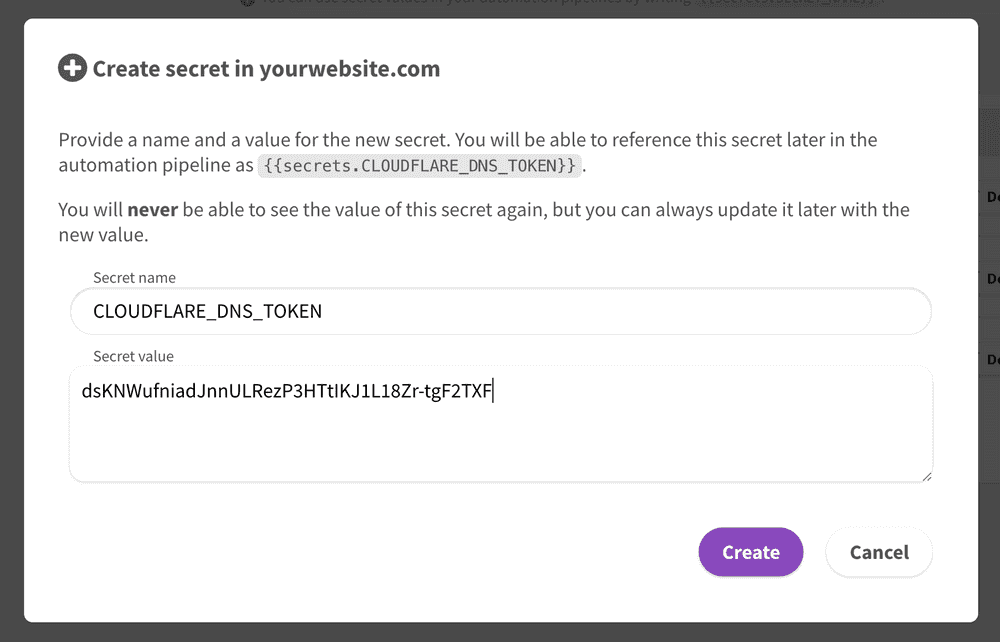
Now you can access CloudFlare's API with the newly created token, which should look like dsKNWufniadJnnULRezP3HTtIKJ1L18Zr-tgF2TXF.
Let's use secrets to store this token at DataUnlocker, as we don't want it to be displayed
anywhere on DataUnlocker. Later, we will be able to reference this token using {{secrets.CLOUDFLARE_DNS_TOKEN}}.
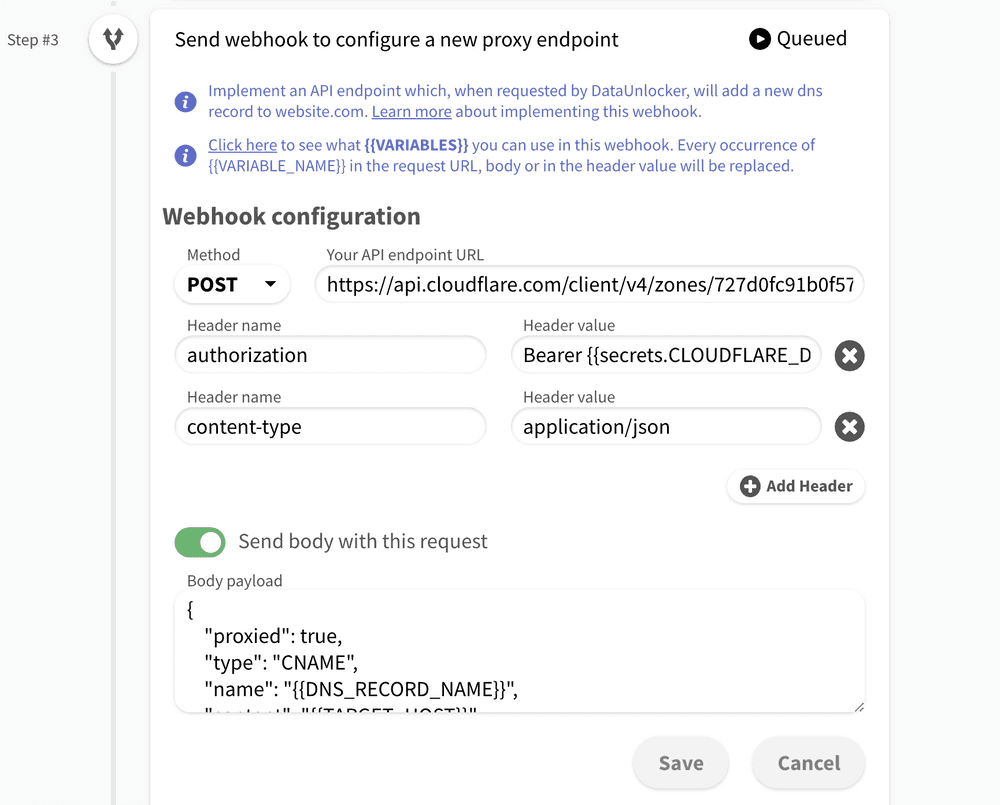
CloudFlare's API docs explain how to create a new proxy endpoint, and based on it we can embed this call directly to DataUnlocker with the following settings:
- "Your API endpoint URL" equals to
https://api.cloudflare.com/client/v4/zones/ZONE_ID/dns_records, whereZONE_IDis the zone ID you can find in CloudFlare Dashboard; - Method is
POST. - Header
authorizationequals toBearer {{secrets.CLOUDFLARE_DNS_TOKEN}}(CloudFlare's token we've previously obtained and saved in a secret); - By clicking "Send body with this request" and using the following JSON body:
{ "proxied": true, "type": "CNAME", "name": "{{DNS_RECORD_NAME}}", "content": "{{TARGET_HOST}}", "ttl": 60 } - We strongly suggest you keep the
"proxied": truefor the DNS endpoint configuration.
The resulting configuration will look like this:
After pressing "Save" (and configuring other pipeline steps), try running this automation pipeline to test whether this webhook works. You will be able to abort the pipeline at any time.
- You can analyze both the request and the response of the executed webhook.
- If the webhook fails (either receives statuses 4xx/5xx or times out), DataUnlocker will use exponential backoff with the maximum interval of 16 minutes to retry it. After 2 days (the default) of unsuccessful retries the pipeline step will eventually fail and send the email notifications requesting a manual action.
Congrats! Now we've successfully created a new DNS record using the CloudFlare's API.
Implementation for PATH proxy endpoints
When using PATH proxy endpoints, this webhook must create a new route on your domain by configuring your reverse proxy, and point it to the new host used by the new proxy endpoint. Unlike with DNS proxy endpoints, the implementation of this webhook is very infrastructure-dependent, as the number of technologies you may use to configure routes and especially the reverse proxy is really big.
- When using nginx, find a way to dynamically update its config, most likely by writing some code in your infrastructure to create this endpoint first.
- When using Vercel, check this repository
as an example of the reverse proxy configuration. You can use environment variables to pass
URL_KEYandTARGET_HOSTto the application, and with the use of the webhook you will be able to edit them using Vercel's API. - In the cloud environment like AWS, Google Cloud and DigitalOcean, check whether the load balancer you're using can perform path-based routing and perform a reverse proxy with a path prefix. If not, most likely you will need to create a (micro)service which will just serve as a simple reverse proxy to DataUnlocker.
- ...
There are no specific instructions available at the moment due to each customer's setup is very different. Please contact [email protected] if you want to consult with us about setting up path-based proxy endpoints and the automation for it.

