Webhooks
Webhooks are steps of the automation pipeline at which DataUnlocker issues HTTP(S) requests to the URL provided by you to notify your applications about the required changes in, for instance, proxy endpoints or asking to replace the DataUnlocker's script. There are 3 webhooks in the installation refresh pipeline:
- A webhook for the new proxy endpoint configuration.
- A webhook for updating the script.
- A webhook for deleting the old (blacklisted) proxy endpoint.
A typical webhook configuration looks like this:
The above webhook is configured:
- To send the
POSTrequest tohttps://my-api.com/handle?newEndpoint=random-hash.yourwebsite.com. - To send the following
Content-Type: application/jsonbody within this post request:{ "HOST": "{{HOST}}", "TARGET_HOST": "{{TARGET_HOST}}" }
Variables
You can use {{VARIABLES}} inside the webhook, both in the URL, headers or in the body of the request.
You can check what variables can you use by clicking on the "click here" text in the message above the webhook
configuration.
Uppercase variables are webhook-specific, and may not be available in the other webhook. For instance, in the new proxy endpoint configuration webhook there are two main variables:
| Variable Name | Description |
|---|---|
HOST | A new domain name which DataUnlocker asks to create in case when DNS proxy endpoint is created. Value example: random-hash.yourwebsite.com |
TARGET_HOST | Host which either DNS record or path-based proxy endpoint must target. For DNS proxy endpoint, this is the value of a DNS record. For path-based proxy endpoints, this is the host the reverse proxy must proxy requests to. Do not validate this value in the webhook, as the domain pattern used by DataUnlocker may change to keep circumventing filtering lists. Value example: r2bf4c1su46e.ddns.dataunlocker.com |
And the final JSON body from the example above in case of the DNS proxy endpoint would be this:
{
  "HOST": "random-hash.yourwebsite.com",
  "TARGET_HOST": "random-hash.ddns.dataunlocker.com"
}
You can also use context variables like {{pipeline}} to access the properties of the previously run
automation pipeline step. You may use a JavaScript-like syntax (dots . or brackets [0] ["property-name"] ['property-name']
to access object properties recursively.
You can also access secrets (secret values) using the context variable secrets.
If you would like to read secret value of the SECRET_NAME, use {{secrets.SECRET_NAME}}.
Here's the example of the spec of available properties in the
context (excluding WEBHOOK_SPECIFIC variables) you can access this way:
{
  "secrets": {
    // Secrets as configured on the Secrets page.
    "SECRET_NAME": "secret value"
    // ...
  },
  "pipeline": {
    "id": "61a4c7b0d865fe1c789bfa50",
    "steps": [
      {
        // Webhook request (made by DataUnlocker)
        "request": {
          "at": 1638189268514,
          "url": 'https://yourwebsite.com/handle',
          "method": "POST",
          "headers": {
            // All headers are lowercase when accessed.
            // For example, access this one with {{pipeline.steps[3].request.headers['content-type']}}
            "content-type": "application/json"
          },

          // The raw (string) request body
          "bodyRaw": "{\"count\": 42}",

          // The parsed body so you can access its properties.
          // Currently, DataUnlocker parses JSON bodies only (when Content-Type header is application/json).
          "body": {
            "count": 42
          }
        },
        // Webhook response. Its headers, bodyRaw and body work similarly to webhook's request.
        "response": {
          "at": 1638189269147,
          "statusCode": 200,
          "headers": {
            "content-type": "application/json"
          },
          "bodyRaw": "{\"count\": 42}",
          "body": {
            "count": 42
          }
        }
      }
    ]
  }
}
For instance, to access the "count" property of the webhook's response in the other webhook (defined in step #3),
you can use this syntax:
{{pipeline.steps[3].response.body.count}}
To get the current pipeline's ID you would just write:
{{pipeline.id}}
Results
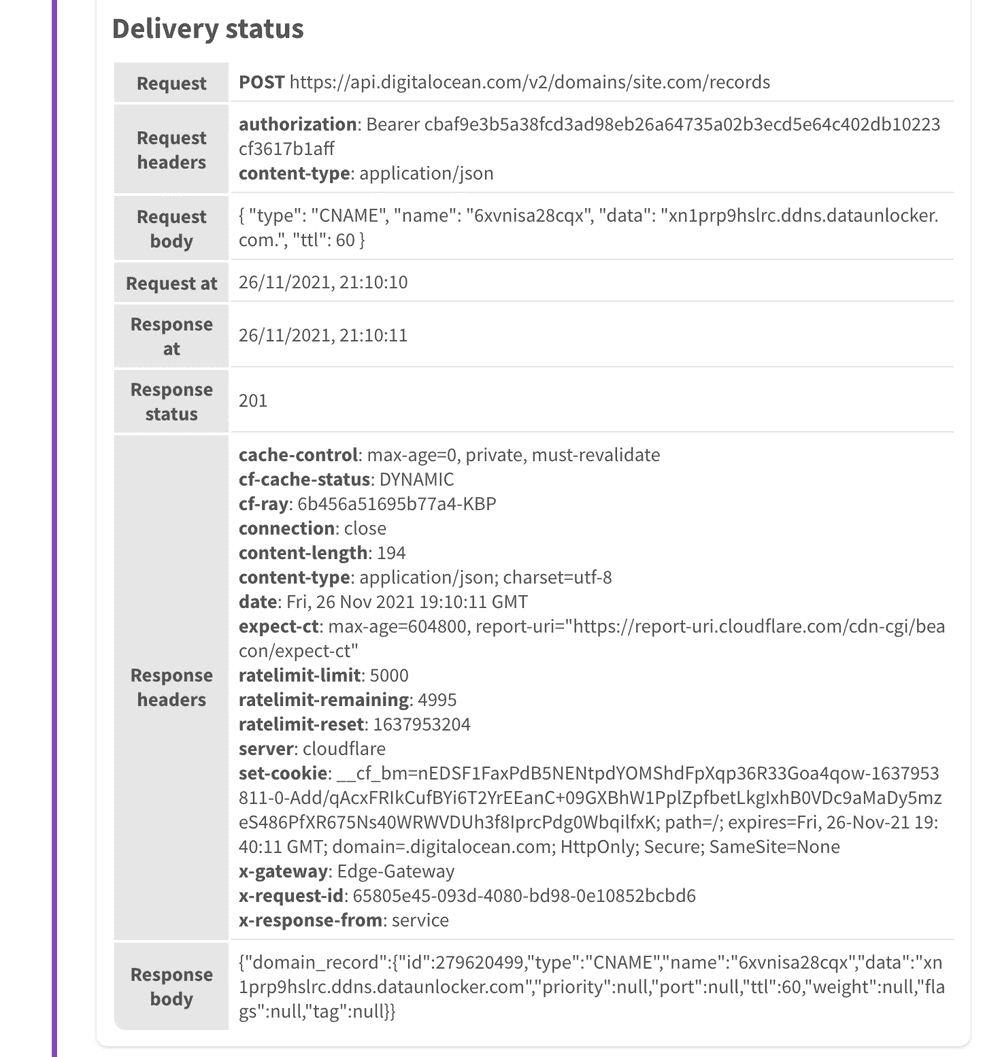
Once the webhook is sent or delivered, you can see its requests and responses in the corresponding webhook's step. Note that only the latest request and response is saved, or in other words, if there were a few delivery failures and the webhook succeeds, only the latest request and response will be displayed.

